Pages

Showing posts with label doily. Show all posts

Tuesday, September 7, 2021

Still adding beads

 The doily with a ton of beads is still on the shuttles. There’s 22 repeats in this round. Each repeat has about 6 beads that need to be added at a join, so it’ll be slow going.

Add to that, I’ve been helping to get our house to the next stage of remodel.

So, soon I’ll be getting back to the designing phase of my tatting life.

Stay safe and healthy!

Thursday, August 12, 2021

And Round 3

Interwoven Picot Medallion
round 3
I’ve finished tatting the penultimate round. As a reminder, the full pattern was published in the IOLI Bulletin Vol 41, No. 4. Thank you Cajah Reed for sharing. Your write up is wonderful and the Medallion fun to tat. 

I’ll be adding more beads for Round 4.

Wednesday, May 5, 2021

Proof of concept

 Remember this wonderful doily pattern? 

Thank you Muskaan for inspiring us!!! 

I wanted to create a square version. So far, so good:

To be continued……..

Tuesday, April 6, 2021

Fantasia idea almost done and dusted

With the coming of Easter, and securing a vaccine appointment, I have been able to return to the design folder. I began this pattern idea in 2020. The center fell into place nicely. The middle section is sketched out. The outer round needs a bit of tweaking. Now to tat a sample with all 3 ideas connected into one piece of lace.

I think I’m closer to performing the piece than completing the design!

Thursday, December 31, 2020

Inspiration struck....again....whew!

 Months ago I started looking at a Fantasia BWV 572 by JS Bach (surprised at my choice of composer? I hope not!).

The composition is a fine example of the Fantasia form in the Baroque era. Classic (pun intended) ABA with brilliance in the first and last sections with solid harmonies in the middle section. I like puzzling out the structure of the harmony and using the bit of Music Theory I’ve learned over the years. That can usually give me a good basis for putting the music into thread.

Except this time.

Until last night….about 2 AM.

A foray into the thrift shops yesterday uncovered a lovely little doily. I’m in the process of blocking it now so I’ll share a picture later. The center section can be recognized as tatting with a bit of crochet between it and the tatted edging. I’ve worked the edging many times. It’s a simple ring and chain that meanders from edge to center to edge and is fun to work.

That edging inspired the A section motif. I’ll use stacked chains for the B. (chortle with glee can be heard)

Thursday, September 3, 2020

Boustrophedon


I came across this in my reading thisweek. In this Pandemic time, I resolved to learn more Bach (Fantasia BWV 572 for video see this post); finish a monster doily begun *ahem* several years ago; catalogue my music; etc. Oh, and learn more about teaching left-handed people to tat. Several veteran teachers have shared how they teach “lefties” and I have my own experiences to ponder. Because my right hand has suffered the most damage over the years, I try to learn new skills left-handed first, then if I just can’t manage, I try right-handed. I still write in my journal using my right hand as that’s not a *new* skill. J I was alerted to this article by Marjorie Mann written for Needle Arts (publication of the Embroiderer’s Guild of America. The series is on Left, Right, Up, Down, and Around in stitching. I found her insights very useful for teaching tatting.

In the second article of the series, Ms. Mann wrote of the concept of Boustrophedon in stitching. As she describes it, the stitcher economizes on thread by stitching “right-handed” one row, then “left-handed” the next row. In her opinion, the technique is both handedness neutral and handedness inclusive. I immediately saw that. It explains what I’ve observed watching a good friend stitch! Incidentally, weavers must learn to throw the shuttle with both hands. One learns which side is easier to keep a good selvage and keeps that in mind planning for the next warp.

So, shuttle tatting…..

In my opinion, lefties have an easier time learning the flip. They’re used to holding things in their right hand and moving them around. They have an easier time relaxing their left hand on command and usually find individual finger movements easier. I encourage a leftie to hold the shuttle however they feel comfortable. I’ve even encouraged trial tatting with me providing the hand with ring thread wrapped and ready. Only one person has decided they needed to hold the shuttle in their left hand. Taking the time to establish that made all the difference in the world for her!

It’s good to know the challenges stitchers face in handedness. I will be exploring boustrophedon in the future.

My motto: The knot doesn’t care how it’s made, the thread just wants to be lace!

Thursday, May 21, 2020

Pivoting with picots

Image titled Make Rings and Picots in Tatting Step 6


Talk to just about any designer in the tatting world and picots will come up. Yes, color and negative space are discussed too, but picots seem to always be in our minds. Picots connect rings and chains. Picots fill negative space. Picots can add shape and decorate any element. In doilies, picot size can make or break whether the piece lays flat, cups, or is symmetrical. Adding beads can be accomplished with picots. One picot can provide so much practical and decorative possibilities.

Perhaps that is one reason tatters can roll with the punches so easily. To be sure, we have honed our ability to stubbornly work towards goals. Anyone who has completed a doily with more than 3 rows (bigger than the average snowflake) and strung more than 15 beads (thinking of a Nina Libinpattern) uses that streak of stubbornness. But, particularly when we’re designing, we may start out using a picot to decorate or join elements and realize that it needs to serve another purpose.

So, to all those weary of pivoting and rolling with the punches as Spring 2020 turns to summer, consider a shuttle or needle and a ball of color. Release your inner creative mind and nurture your soul with thread. Joinus tatting!
Image titled Begin Tatting Step 19

Thursday, April 30, 2020

Thread can be stubborn


Like many households in the last few weeks, we have been cleaning, tidying, and sorting. I’ve picked up some projects that were put aside unfinished. Nothing is finished yet. I’ve cut out and revisited, and discovered again that thread can be stubborn. I’ve got time to work it all out now.

I’m continuing to work on Jon Yusoff’s Challenge doily she named Threads that Bind. I’ll be adding color in the next part. I hope my solution to how to add just a bit works out.

Wednesday, April 15, 2020

Challenge in vintage thread

Jon Yusoff Thread that Bind challenge doily


My Threads that Bind doily is continuing to grow. Here’s what it looks like after finishing Day 5 round. I have a feeling the white will not stay white as it comes off the ball. That’s the challenge of working with vintage tools and vintage thread. You never really can predict what it’ll look like.

Hope your days are getting more predictable with opportunities to create and enjoy beauty.

Tuesday, March 24, 2020

Challenge with vintage


While most of the world is in Shelter in Place mode, I can’t just sit and not create something. I’m like the kid that can’t sit still; I can’t not create. So, when I saw a post about Tat-a-Renda’s Challenge design, I decided to join in. But, what thread to use?

Her design is starting out like a vintage doily. So, when I spied this bit of vintage thread, I thought perfect!

This is what it looks like so far:

Remember the vintage shuttles I picked up on this trip? Well, this one is labelled Justrite. I do like working with it. I normally don’t like the feel of a metal shuttle. I prefer wood. But, this one is balanced better and almost feels like my ivory shuttle. Since it twists apart to fill, I wondered if it is the inspiration for the Moonlit shuttle. Incidentally, today is the last day to pre-order from Handy Hands. I ordered my bag in blue!

Tuesday, January 28, 2020

Spring Tat-along


Announcing a new tat-along for 2020!

Renulek has started releasing her Spring doily! I like how the pattern looks this year. I’m still working on the 2017 “napkin” (gotta love Google translate!) so I won’t be starting this one. I see a patriotic color scheme though.

Join in! The doilies work up quite nicely.

Oh, and classes are beginning to fill up for Shuttlebirds2020. More excitement!

Tuesday, September 17, 2019

Sonata BWV 1034 in pinks and purples


Here’s my version of Sonata BWV 1034 in pinks and purples:

Sonata BWV 1034

I tatted this up for Palmetto Tatting Group Tat Days 2019. I chose the colors to help students see the various elements. I based this piece on the vintage pattern Sonata that I found in a Handy Hands newsletter. Most vintage patterns call for tie and cut between rounds and such. Now, I’m not allergic to cut and tie, but if I can work a small short split ring or split chain, I’ll save the effort and time of hiding ends.

I recommend working each of the inner motifs in groups of 2. That means you’ll be working two split chains and hiding ends twice. You can easily climb out between rounds 1 & 2 and also between 2 & 3. But, between rounds 3 & 4, it is more difficult to create a seamless chain. I find my attempts at climbing out with a mock chain, split chain, split ring and such show with extra knots and awkward tatted lines.

And then there’s the color choice. That can dictate where you’re hiding ends. I had fun working in the variegated named Girly Girl. The pinks and purple just were fun!

I hope you enjoy this. If you wish a copy of the pattern, drop me a comment (leaving your contact info) or email.

Thursday, April 11, 2019

Friends help!


I have a local group of tatters who get together each Tuesday afternoon. We support each other and teach each other. I have learned so much from them! This week, we discussed what to use for thread color and beads to finish out the Monster Doily (Wiosna 2017).

Here what I decided:


I want to use some green, but the green thread was too, well, GREEN.

I have more Sea Foam beads, so they went into the YES pile. I pulled out other beads I used in the previous rounds along with some “mauvey” beads.
I am intending the final border to be in black thread with clear sparkly beads.
Sea Foam beads are in center, mauve on top, matter finish on bottom

That left thread color for a couple of rounds in between. I pulled out my size 80 thread box and began rummaging. Nothing looked intriguing to anyone. More vintage thread surfaced from someone else’s stash and this ball stood out:


More discussion and bead color ideas were floated. I now have 4 colors in the maybe pile. I think I’ll do some test tats and see what I like…….

Tuesday, April 9, 2019

Wiosna 2017 through Round 10


I finished another Round! It’s taken me awhile…..
Renulek's Wiosna 2017 through Round 10


Two years……

But, I had to put it aside while other projects were completed. Now, I have the puzzle of what to do for the final rounds.

Oh, and here’s the link to Renulek’s blog and her Etsy store. The pattern is available through her Etsy store or directly from her. I like the look of Wiosna 2019, but I think it may take a while for me to get to it.

Tuesday, March 12, 2019

Clipped the Climbing out


I’m always interested in finding ways to avoid hiding ends by climbing out from one round to another. 

As I finished Round 3 of the bun holder, I carefully worked a split chain and started on what I thought would work for row 4. I decided it didn’t work. 

So, out came the scissors and the split chain disappeared (After the sun came out the next day!) And ends to hide……

I think my idea will work, but I want to measure to make sure the row will lay flat and not cup or ruffle. When I figure it out, I'll let you know.

Thursday, March 7, 2019

On to Row 4

Spencer doily Row 3 finished

It’s taken a month or so, but I’m finally to row 4 of the Pearl Bun Holder.

I’m using the same center as this one, and adding fresh water pearls. After sorting through my thread stash, I settled on using Gutermann 40 weight cotton sewing thread wound with Sulky Metallic in Prism White.

Thursday, November 15, 2018

Wiosna Round 10 progress


I decided to take this on a trip recently. I’d forgotten the folks I visited had seen the doily before I started with the lighter thread. Everyone was most appreciative of my efforts. I must say, I think it’s coming together. No cupping….yet…and I’ve added all these beads to the pattern! More beads to come in the next 2 rounds and then another thread color change. Whew!

I really like this pattern. I was so touched by the gift when I received it. Maybe I’ll finish this doily in time to join in if Renulek designs another in 2019.

Thursday, November 8, 2018

Mlle Riego insertion sample


Recently, the Online Tatting Class discussed a pattern from a book credited to Mlle Riego (pub. 1866) available through the Antique PatternLibrary. I disciplined myself to not start on this as I have a monster doily in progress.

This article on the pattern collection shows 3 edgings that caught my eye. I worked the middle one in Lizbeth Summer Fun. Maybe the choice was influenced, just a teeny bit, by the glorious summery weather we’ve had the last few weeks. It’s not quite long enough to be a bracelet, but could be lengthened. I’ve never liked wearing anything on my wrists, so bracelets never tempt me. Even so, I’m tempted to tat one up for the class and maybe for Bookmark.

The interest in the insertion is entirely selfish. You see, I have a shirt in linen that has a decoration sewn on that is not linen, kinda tacky lookin’ if you ask me. It’s already starting to unravel and look even tackier. Nothing for it but to tat an insertion to replace it. With beads of course. Now to choose the thread and beads….

Tuesday, September 18, 2018

Saga of Wiosna 2017 continues.....


I have been tackling this doily. I was hoping to finish Round 9 this week. Well, I’ve spent hours, and I mean hours, adding thread to the shuttles to complete the round. Each repeat takes me about 20 minutes to tat. Adding thread slows me down a lot! I can’t wait to get to the next stage. I still haven’t decided on colors. Soon………

Thursday, April 26, 2018

I've been busy....


But nuthin ta show

I completed the second earring. Now to block and mount on wires.

I completed the eighth round of Wiosna 2017 by Renulek. But, it looks kinda funky without the next round. I’ve taken a picture, but it’s not worth sharing.

I’ve chosen which Sonata to use as the basis for the BachFestival piece. Now to decide what to pull out of the music and how to represent it all.

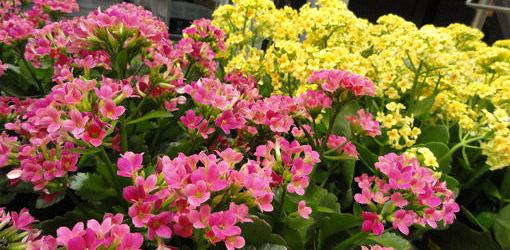
kalanchoe
And I’ve set up another round of gardening. Hopefully, the work we’re doing now will cut down the tedious nature of gardening in the future. Pictures after the weekend. We have some more of the pretty Kalanchoe to plant.